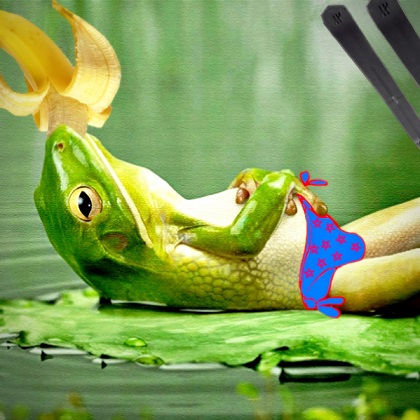
Righto, grab a rum or a beer or whatever makes your mouth wet and get ready to learn some really basic stuff that will never make you look like a pro , but will give you that invaluable minor skill that you can use on forums to impress others who have no flippin' idea of how to do it... inserting stupid pictures into screenshots. Yeah yeah sure sure, someone else can climb Everest or do triple backflips on a skateboard off a horse..but that stuff has been done a million times..BOOOORING. So lets learn how to put a fake cgi monster onto a screenshot of a game, or a banana in a frogs mouth in a bikini on skis if you want, because why the hell not. So, you got that rum ? Lets go...
First things first..you got Windows ? Well then you have paint, that brilliant program that is overlooked as the drunken mans photoshop, because it is..that's why it rocks, none of them fancy shmancy layers and hoo de ha look at me four hundred and ninety two thousand brushes. We don' need no steenkin' photoshop. Numero 2, Photoscape, click that 'get photoscape' button top right you drunkin' bum and download it, it's free man. YOU AIN'T THE BOSS OF ME ..JUST GET IT!
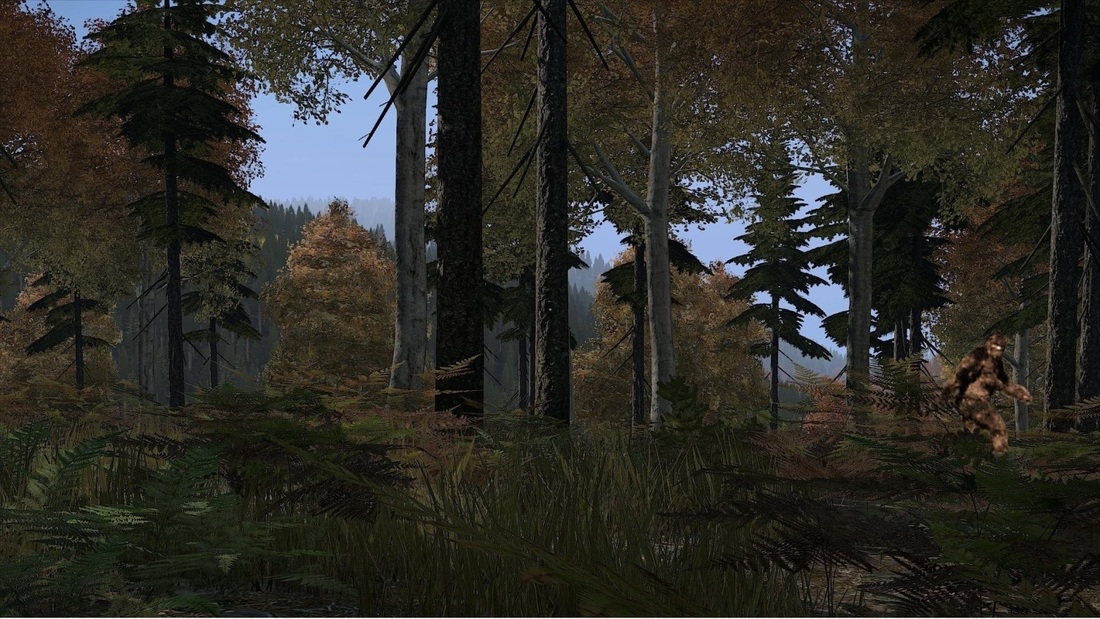
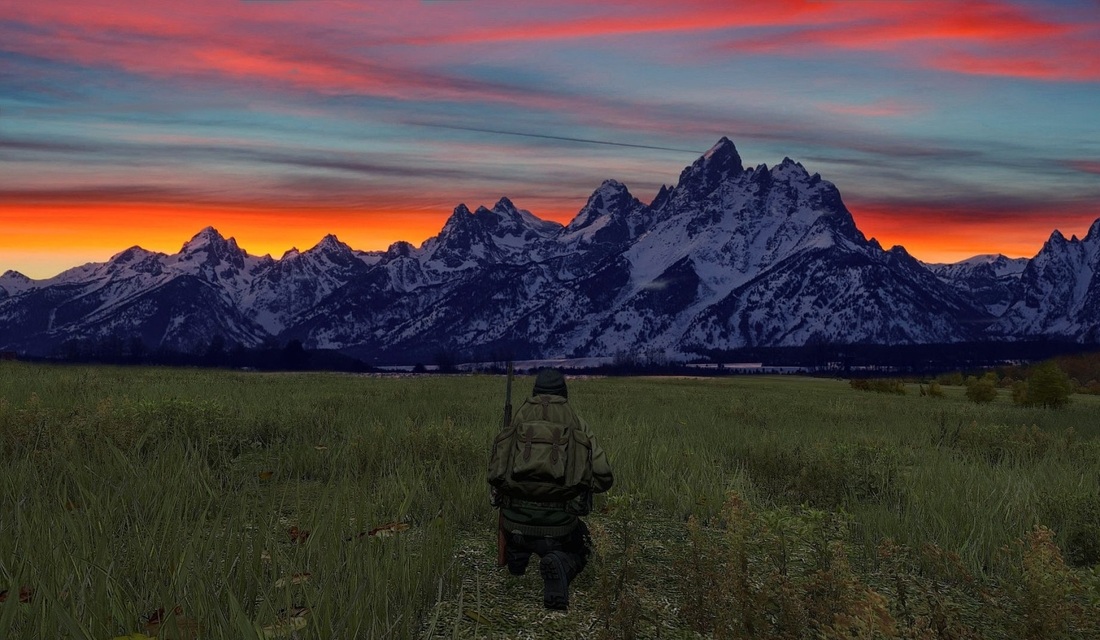
So now we need to know what we are going to do, in this case it is blindly obvious, it's Godzilla... wrecking things. Huh. So i have my in game shot like thus..
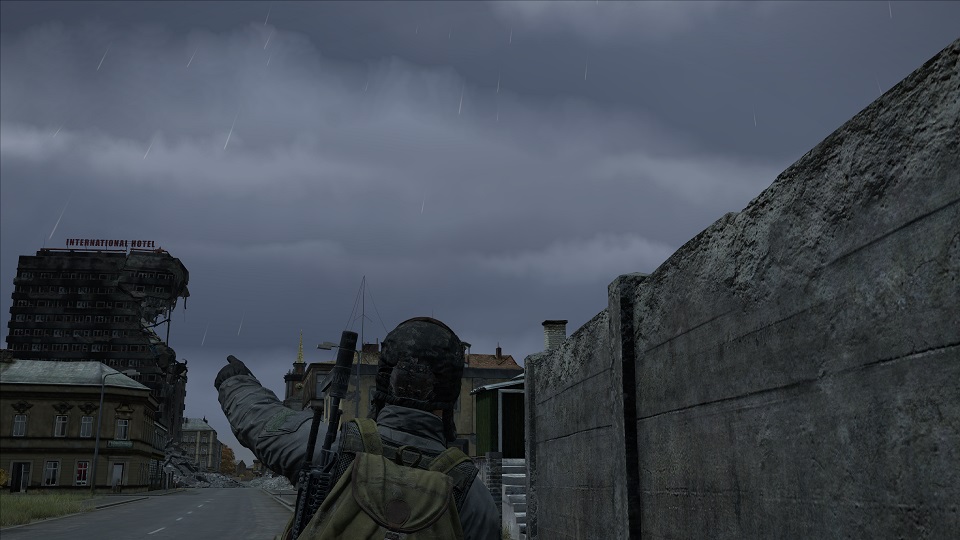
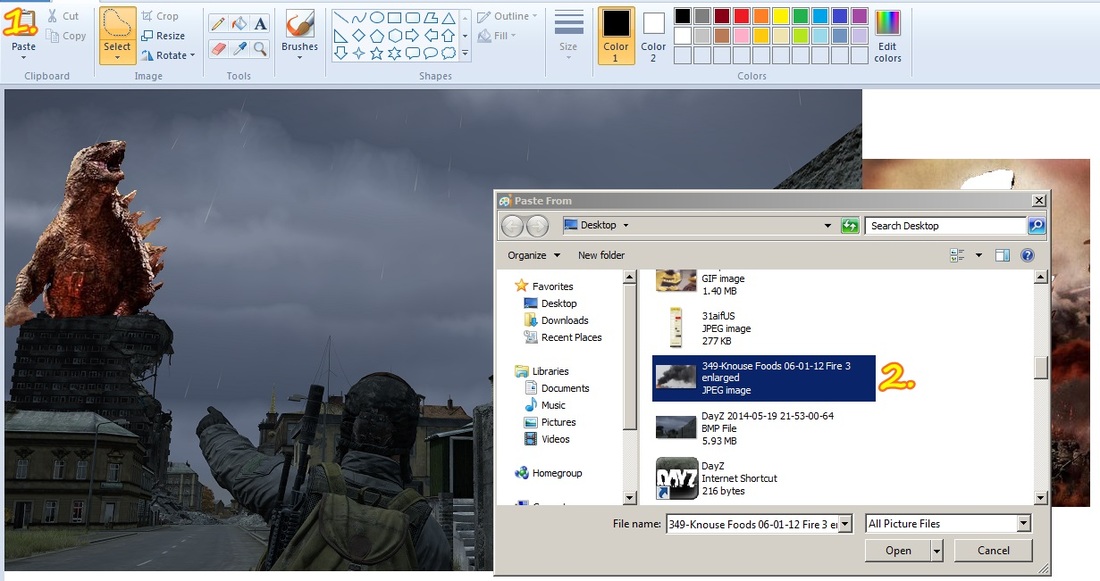
Obviously, please try and keep up, i positioned my in game LEGEND to exactly how i wanted him appear when i thought ' Dude, that building would look fecking awesome on fire with some big monster wrecking stuff'. This is the extent of my imagination. So next we need a monster, Godzilla was only choice as he currently wreaks havoc through cinemas around the world..off to the interwebz..
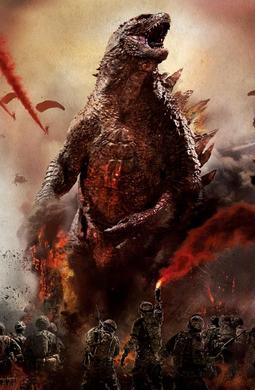
This was were i consumed about half of my six pack of rum as i didn't realise how many awesome pictures there are off this mighty beast wrecking stuff up. There's lots. And they are mostly awesome. Now with Godzilla comes fire and smoke, dude can't take a piss without wrecking at least half a country so off to the next search..buildings on fire..
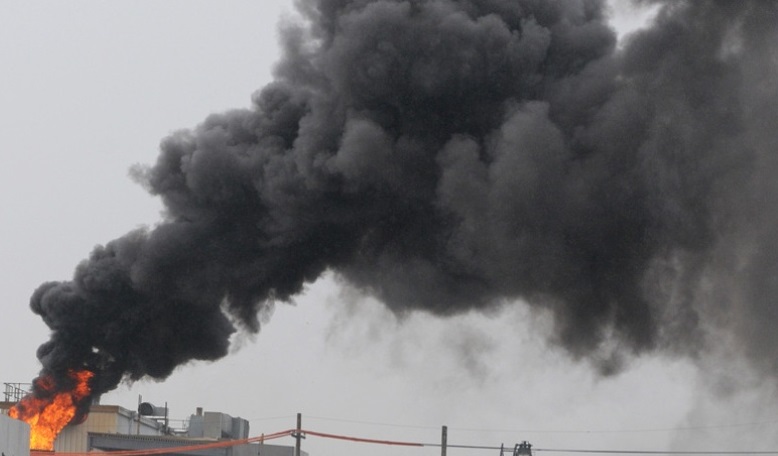
That's what i'm talking about, big chunky billowy smoke and some nice flameage, should work well with the big fella. So i am guessing you are getting the drift, or maybe you are still a few rums behind, smarten up.. we are going to combine these three elements and end up with what everyone around the world likes, wrecked stuff and monsters.
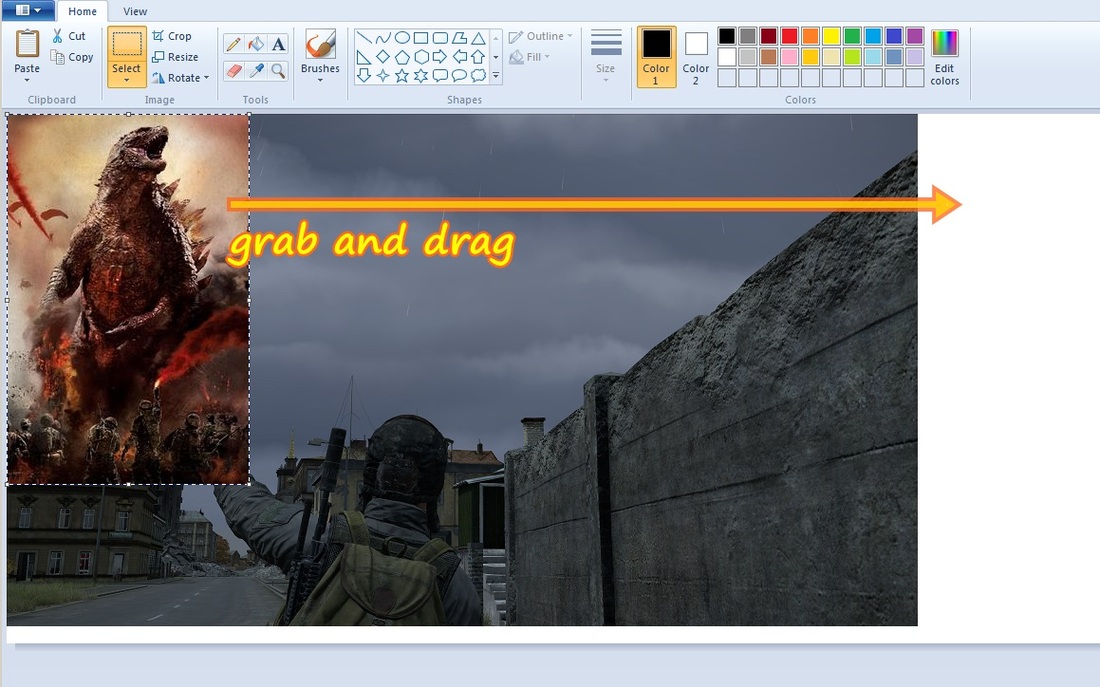
If you simply copy these three pics to your desktop and follow along with the tutorial below you should end up with a pretty decent result. I have a uploaded a full size version of the DayZ guy pointing so just click on the picture above and download the 1920 by 1080 res one to use.
If you simply copy these three pics to your desktop and follow along with the tutorial below you should end up with a pretty decent result. I have a uploaded a full size version of the DayZ guy pointing so just click on the picture above and download the 1920 by 1080 res one to use.
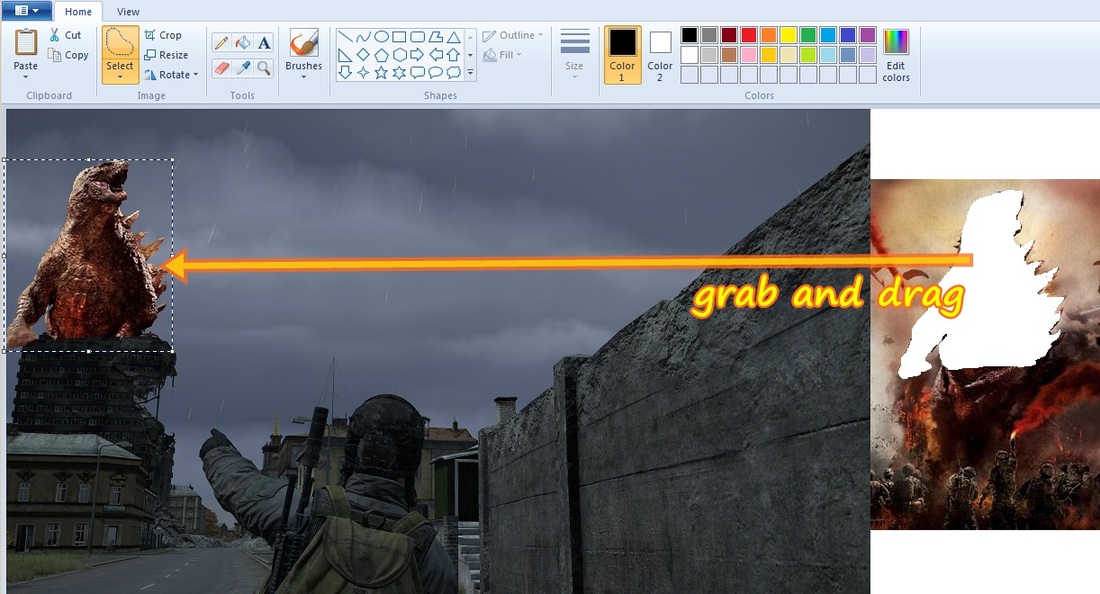
Now we open our beloved Microsoft paint and begin our work. Our base picture we open in paint is our in game screenshot. Then we have a working are over on the right which is simply achieved by dragging the lower corner of the screenshot to the blank space required. Using the paste key (paste from) top left in paint we can open our second shot of 'Zilla from our desktop and plop him down as well..
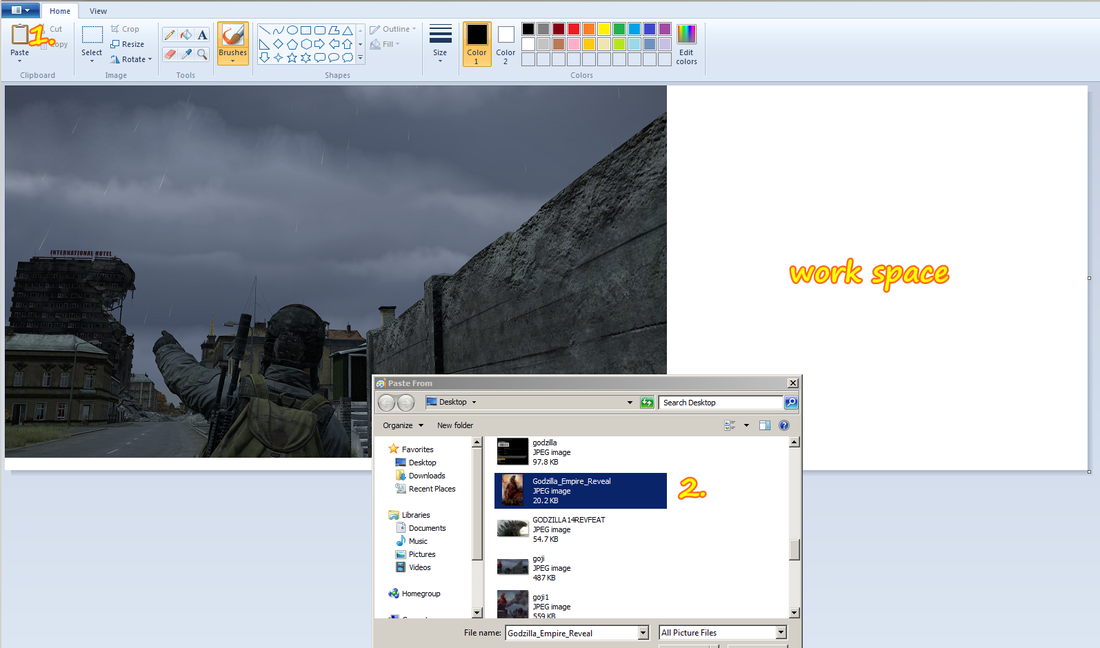
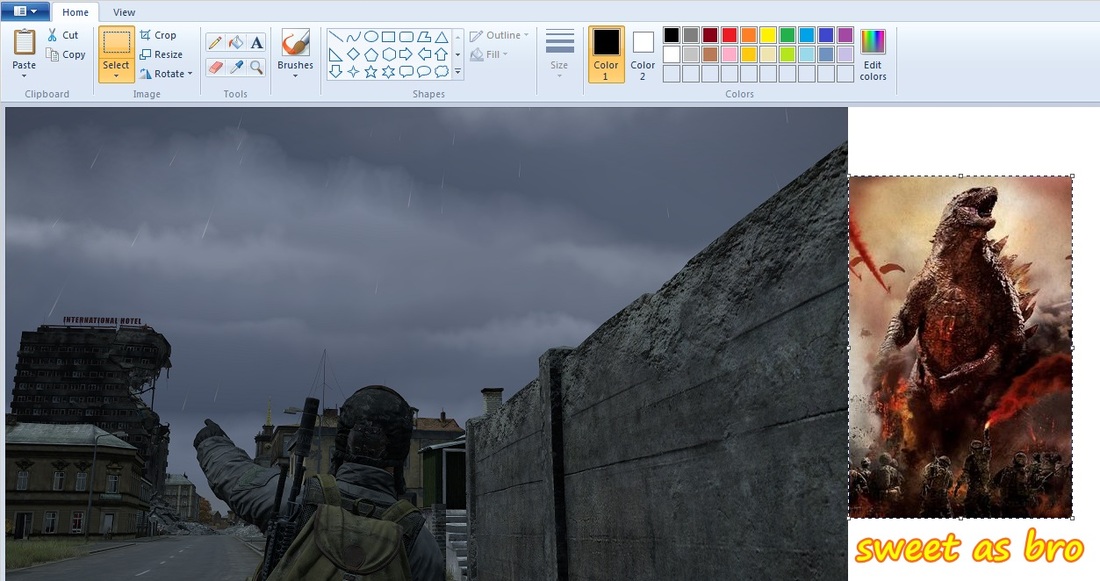
After pasting we end up with this below..I KNOW HE ISN'T IN THE RIGHT SPOT YET !.. just calm down and wait you hooligan. When you open a pic in MS paint it will always lock top left, simply drag it across to your work space and dump him out of the way of your screenie. Before we go any further though, this tip, Ctrl Z will undo your last choice in paint as it does in almost every other program around. So if you dump him in the middle of your screenie whilst grabbing for another rum and he won't move, Ctrl Z and repaste that dawg. Ctrl Z, live it..love it.
So here he is in our work space below out of harms way of destroying our soon to be artwork, told you not to panic you desperate heathen.
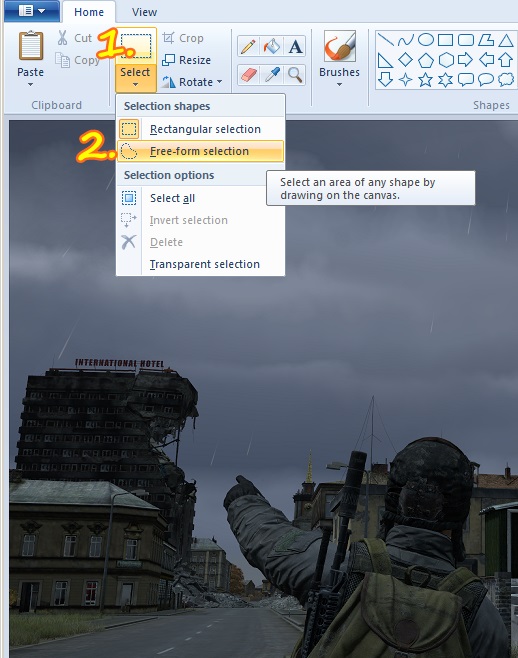
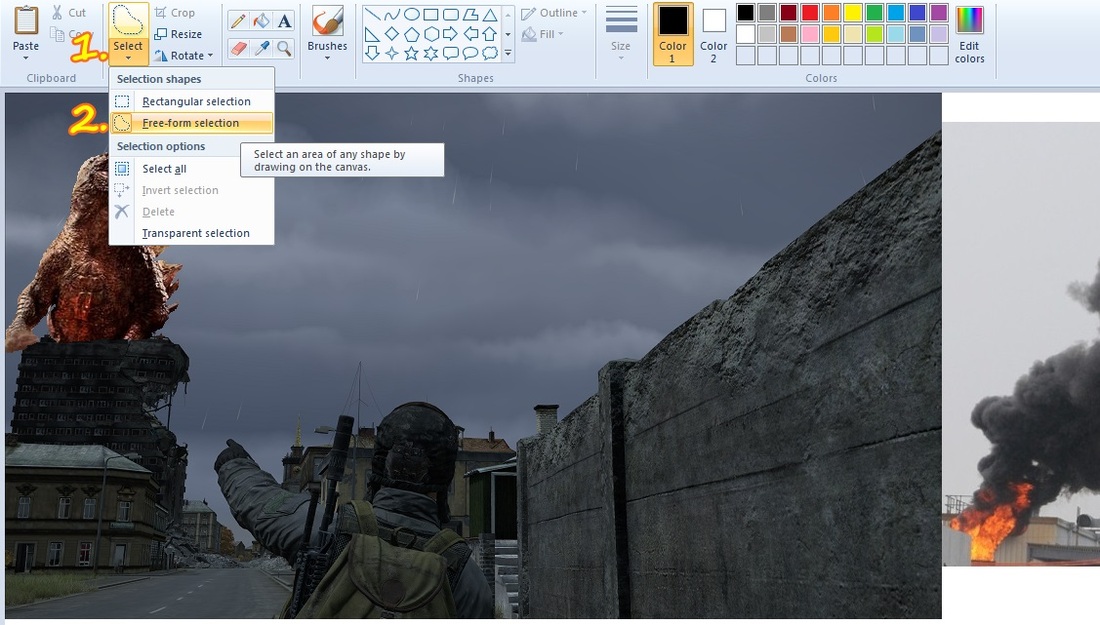
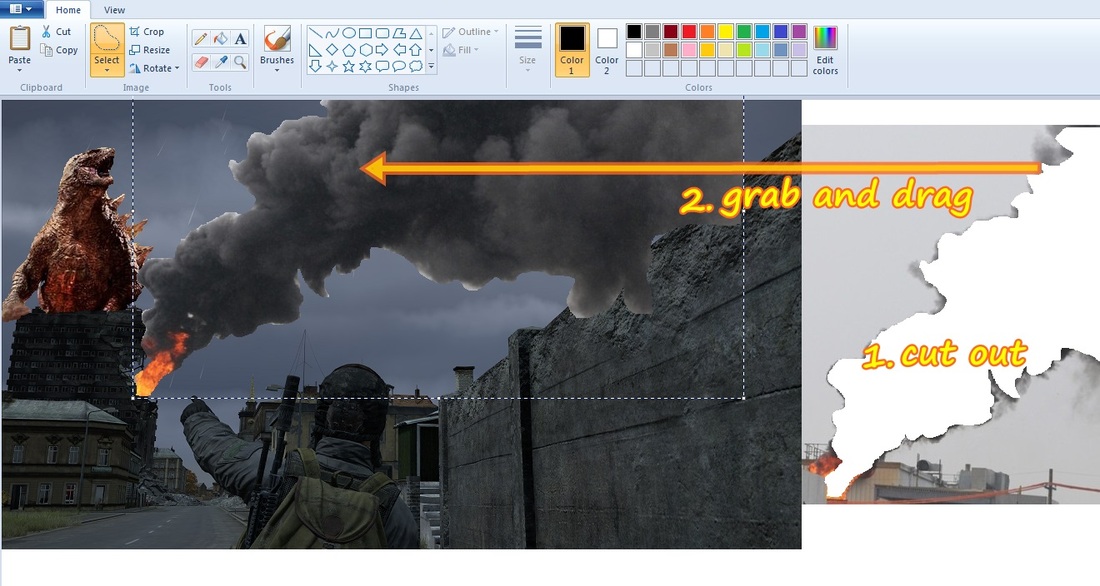
Know we need to chop old 'Zilla out of his little world and put him in ours. Our fun little monster world. Top left and click on the SELECT option as highlighted below, in the drop down select FREE FORM SELECTION this will give you the digital scissor capability you need to cut him out.
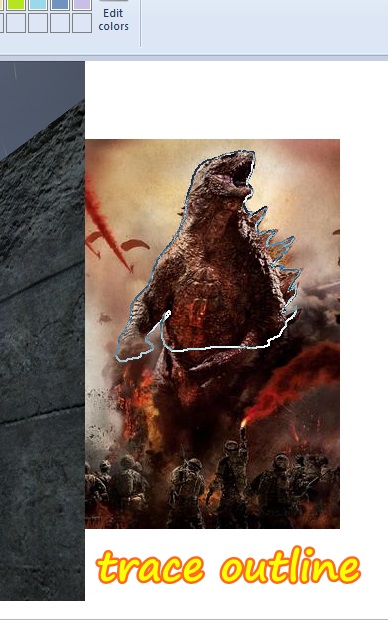
It doesn't get any easier than this, trace around what you want..chop chop chop, just like in prep. Try and get it as close as you can to the edges, we will fix the them later but it is easier if you do a neat job here (i didn't). Anything in the selected area will be what you end up with. We want the top half of 'Zilla as the building covers his man parts nicely. Nobody wants 'Zilla dong draped on a ninth story window.
Now as soon as you stop tracing/chopping the area you have cut out becomes movable, grab that bad boy and slide him across to where he needs to be positioned, he won't mind. Tame that beast. At this stage while our beast is still selected you can also grab the corners of the box and resize him to fit if need be.
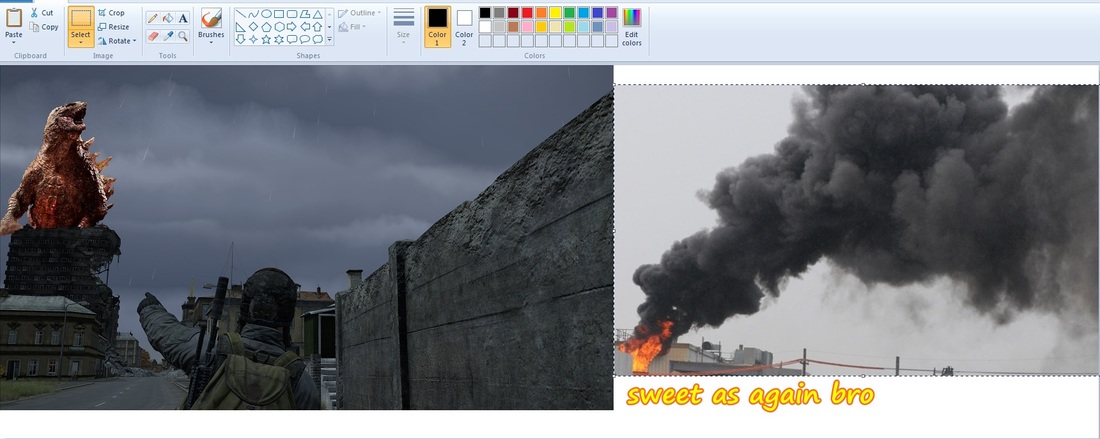
Ok ! So sweet, we have old 'Zillalocks looking like he wants to wreck it up ! And we're not even drunk yet ! But he just sort of looks like a great spiky turd emerging from a busted building..and we have all seen that before, so we need to spice the scene up..flameage and great plumes of smoke are needed. Click that paste button top left, select 'paste from' and find that fire and smoke on your desktop and lay it down like you own it. If your work space is too small simply grab the far right corner of your workspace area and increase it. Yes, that is Bert and Ernie.
Now all of these following steps are the same as we have already done previously, we are just slamming our new elements down, choppin' them out and draggin' them across to where we want it positioned.
Selecting our free form tool to cut out the smoke and flame action
Smoke and flameage cut out and being dragged across to the most fitting spot..RUN LITTLE PEOPLE ! IT'S GODSHILLAAAA!!
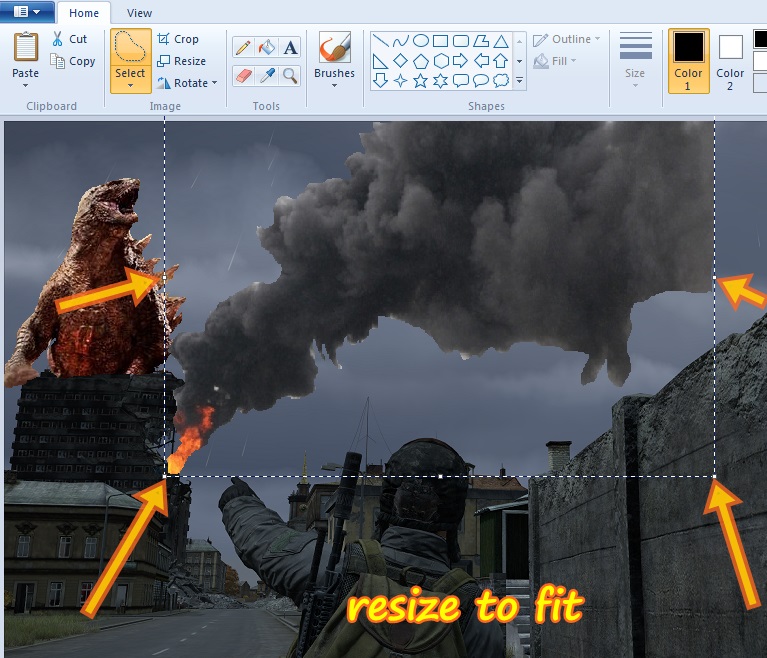
That smoke isn't going where i want it to so now we have to use another of ms paints awesome functions , resizing ! Simply grab the corners as highlighted below , not all of them at once you twat, just pick one..resize it to where you need it to be. Once i have placed my smoke accordingly i crop the entire picture down to the finished size i want.
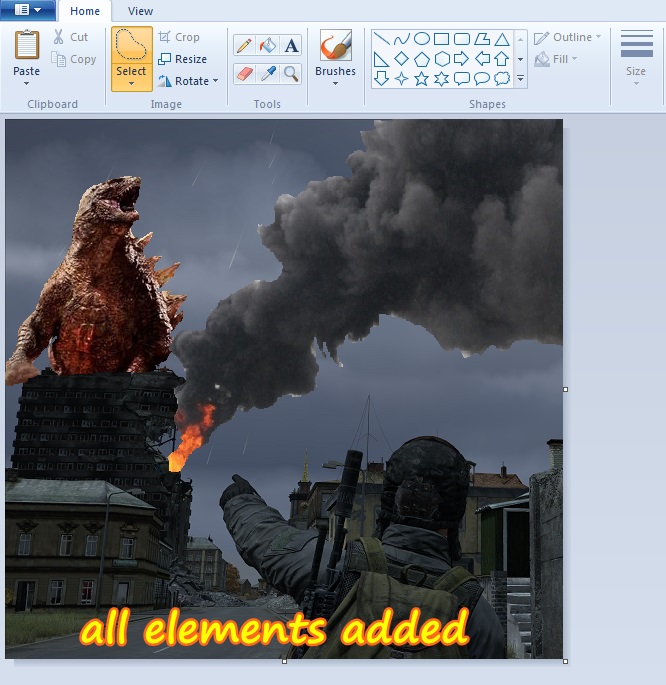
So now we have reached the state in our project where ms paint can help us no more and we must more on to more slightly sophisticated and manly means of picture altering. So if you haven't already, download Photoscape via the download button top of page and then we can finish of our amazing art piece.
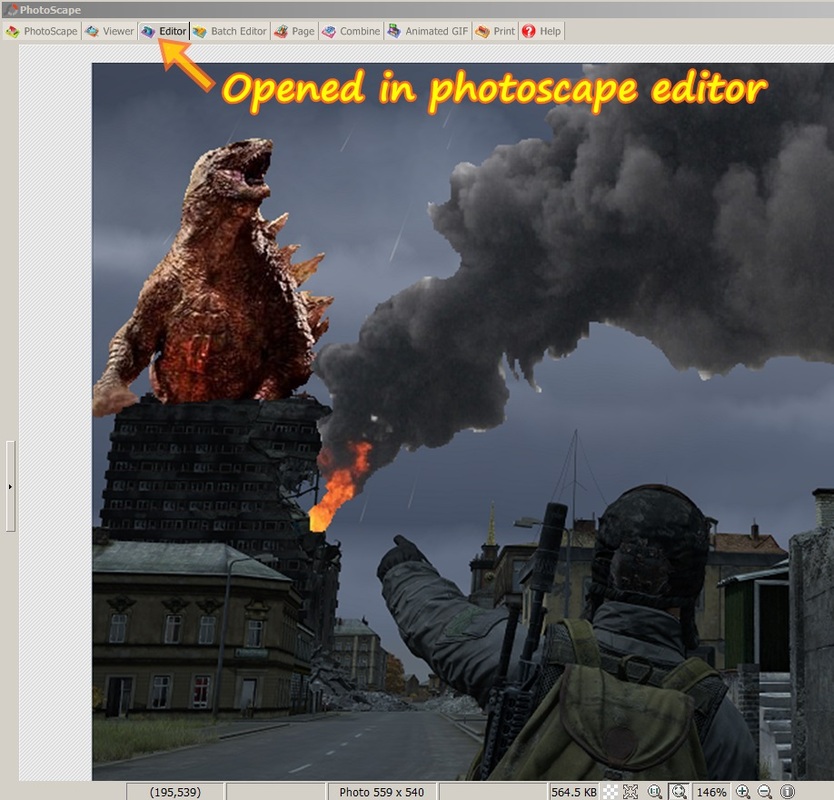
Once you have Photoscape installed and up and running, open our wicked picture in the Photoscape editor. Also notice the little magnifying glass zoom in and out function bottom right, this is handy when doing finer detail and wanting to zoom in to a specific spot. Don't be scared, this shit is easy.
So at this stage we have everything going on but it looks largely tacky but mostly still AWESOME ! We now have a few cool little tools available to us, firstly the blur tool for those extremely dodgy edges. In photoscape on the bottom left row select- TOOLS/EFFECT BRUSH/BLUR LOW. This will give us a dotted circle tool on screen, scrolling your mouse wheel will change the size of the tool. Holding left click will apply the blur in any area when you move the tool (that's what she said) Holding SHIFT at the same time will give you less blur and a lesser effect, and remember, if you make any mistake simply Ctrl Z to undo.
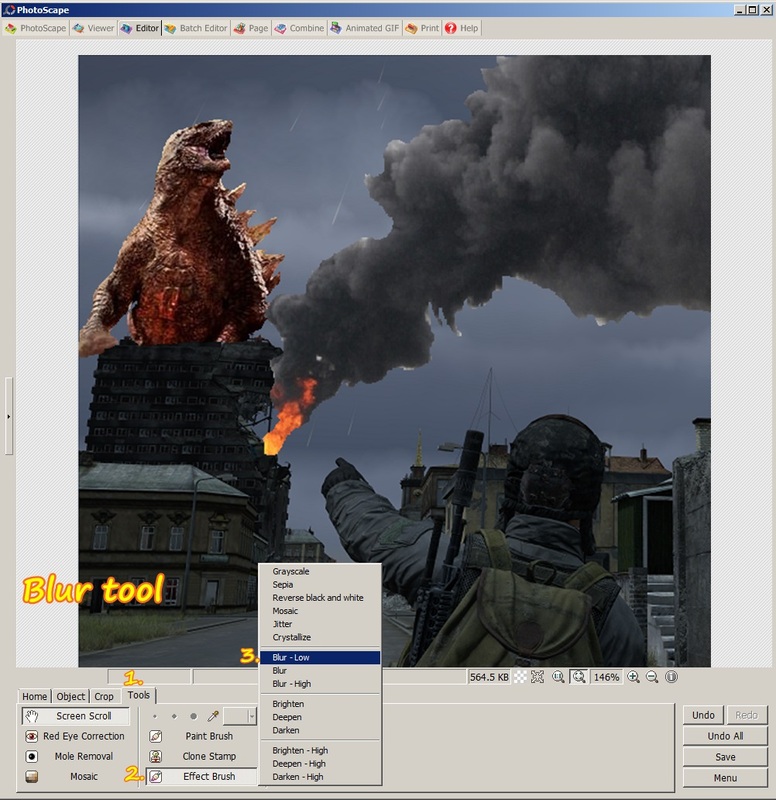
For this exercise i have not held down the shift key so the blur stands out more, so you can see it better you heathen. I have only blurred the top edge of the smoke plume and the top edge of the flame, you can see the improvement over the non blurred lower half of the plume and fire.
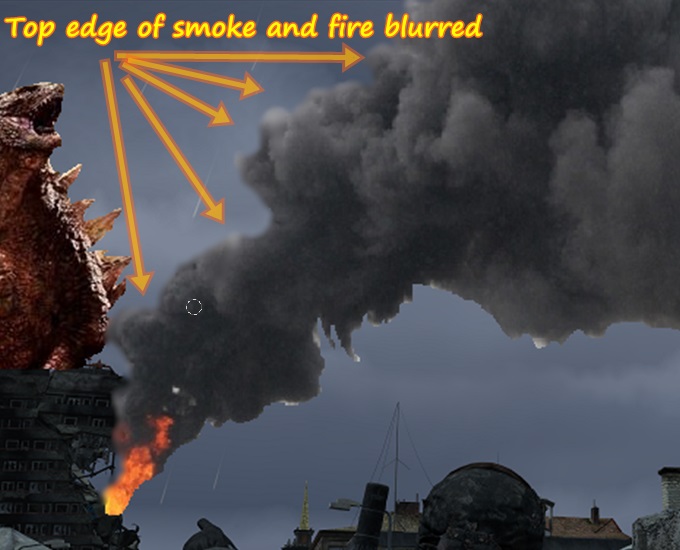
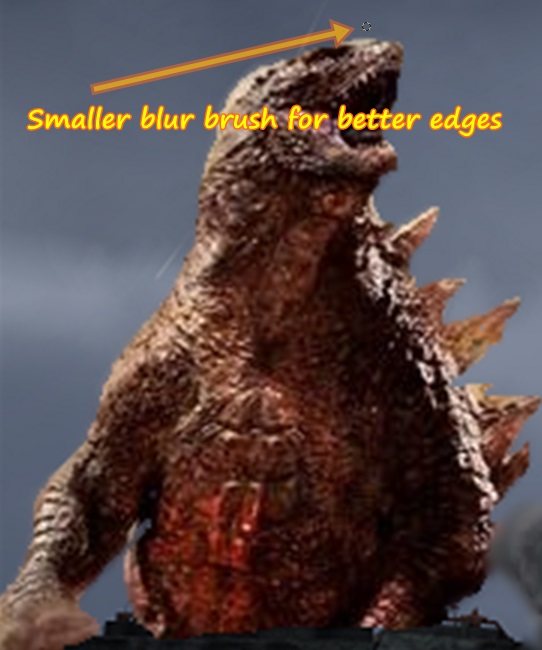
When doing edges i generally use the smallest blur tool size available so as to try and not blur the background at all, or very little. This, like i said above is done by simply scrolling your mouse wheel to change the size of the brush..bro. You can try the edges on full low blur first and then have a look at it, if it is too blurry, Ctrl Z your work and then try again with low blur + shift for a less dramatic blur. You can also go back over the blur a second time with low blur+shift to remove the harder jaggies. Whatever looks best in your own eyes is what it is all about really.
So now i am assuming you have completed and are happy with all of your edges, all of the smoke and 'Zillas outline, i can just wait here until you are sure.... *Shnick*...slurp slurp slurp..ahhhhhh.
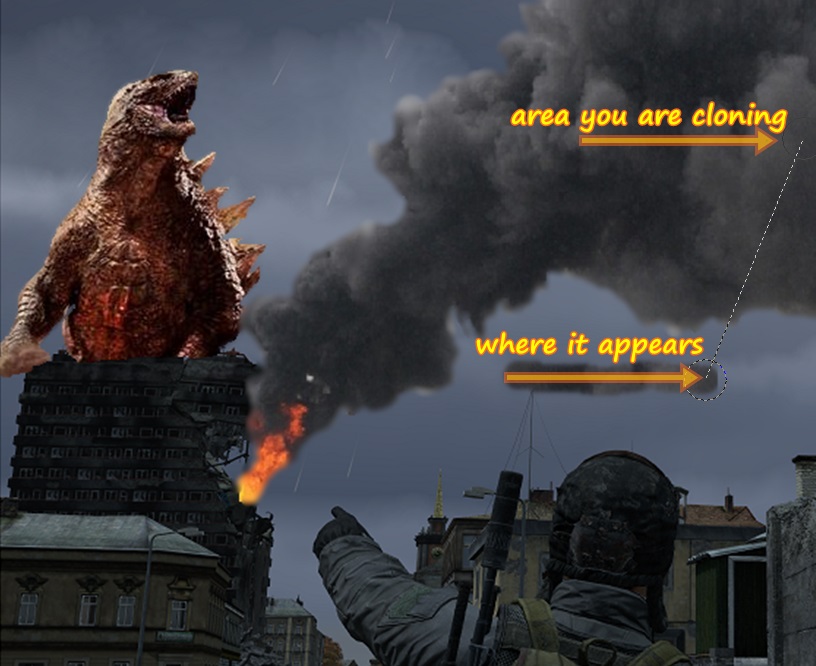
Ok, we done now ? Sweet. Moving right along to the next and coolest tool, the CLONE STAMP. Basically this just mirrors an area and lets you place it in another area. TOOLS/CLONE STAMP, right above your effects there buddy. Once again you will be presented with a circle brush that your mouse has mad and absolute control off. Your first left click places the clone tool and then moving your mouse (without clicking) allows you to drag where you want to mirror whatever is within the circle. Your second left click and hold applies the clone stamp. Basically, in the pic below, what is in the circle marked 3. will appear in the circle marked 4. when i left click.
Ok, we done now ? Sweet. Moving right along to the next and coolest tool, the CLONE STAMP. Basically this just mirrors an area and lets you place it in another area. TOOLS/CLONE STAMP, right above your effects there buddy. Once again you will be presented with a circle brush that your mouse has mad and absolute control off. Your first left click places the clone tool and then moving your mouse (without clicking) allows you to drag where you want to mirror whatever is within the circle. Your second left click and hold applies the clone stamp. Basically, in the pic below, what is in the circle marked 3. will appear in the circle marked 4. when i left click.
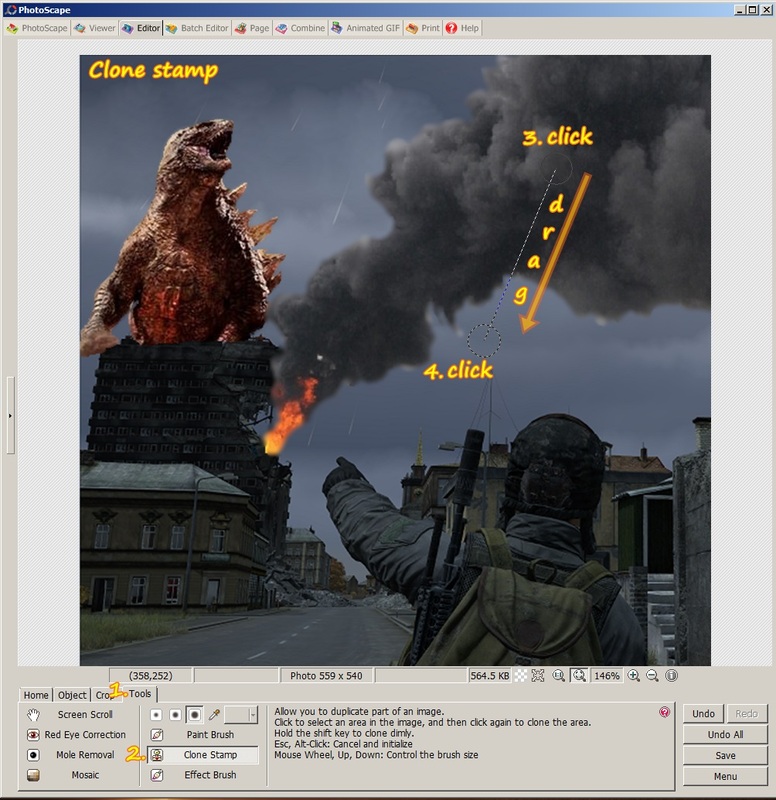
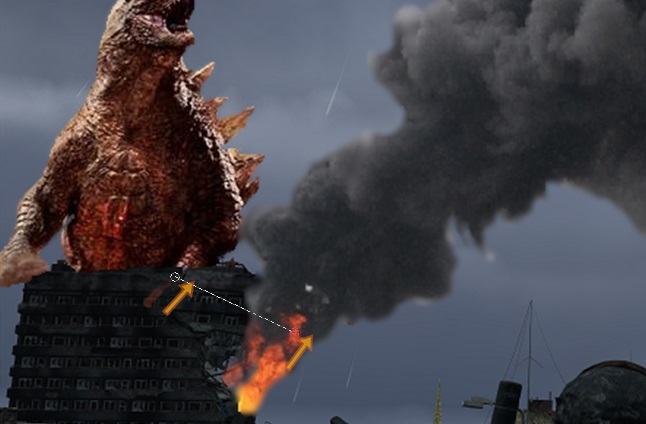
Voila, cloned. I have simply held down left click, moved my mouse right and cloned a straight line section of the smoke. Like the blur tool, if you hold the shift key while cloning it will be lighter opacity clone, and as always, Ctrl Z to make that shinizzle unhappen if you make a mess.
This is where we can get a bit arty without losing an ear. Still using the clone tool, scroll mouse to change clone stamp size and holding shift for a lighter effect i clone some fire so it appears as if some flame action is coming out the windows. You can see the opacity difference in the small amount of fire i cloned produced by holding down the shift key. Depending on how dark or light you want the flame depends on how many times you want to reclone over the top or simply not hold shift, it's up to you you dirty little artist. Ctrl Z if you accidentally burn the building to the ground.
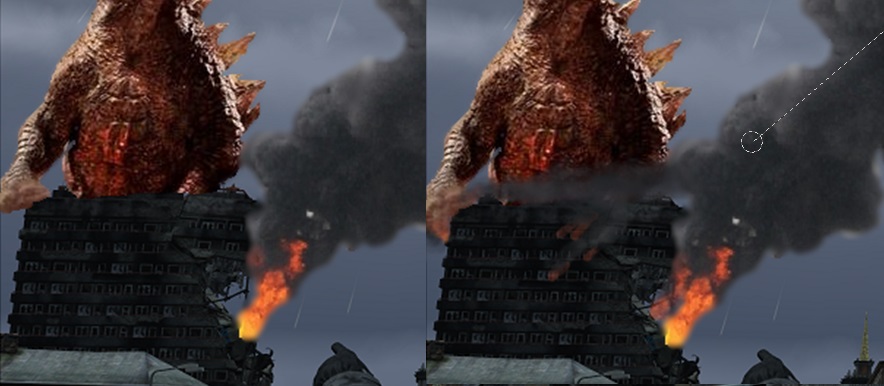
So our comparison shot after some simple clone work, extra bit of flame near the main fire, couple of windows flaming out, added smoke and flame to fill in the gap where his hand is fist punching the building and streamed some smoke across the top. Experiment heaps , mistakes don't matter because of Ctrl Z.
Now we need to look at the pic as a whole and fix any still dodgy looking work, clone stamp will fix those little white pieces left over from my original pathetic attempt at scissoring in paint.

When cloning, especially edges, always try and pick an area of colour that will match . As you can see i have my clone stamp in the same horizontal area as the white piece of smoke so when i clone over the white piece it will end up the same blue as the background. In the after pic you can hardly tell the difference between where the old white bits were that are now blue. I have also held down the shift key while cloning to get a smoother transition between the smoke and the sky. Easy peasy... said your mum.

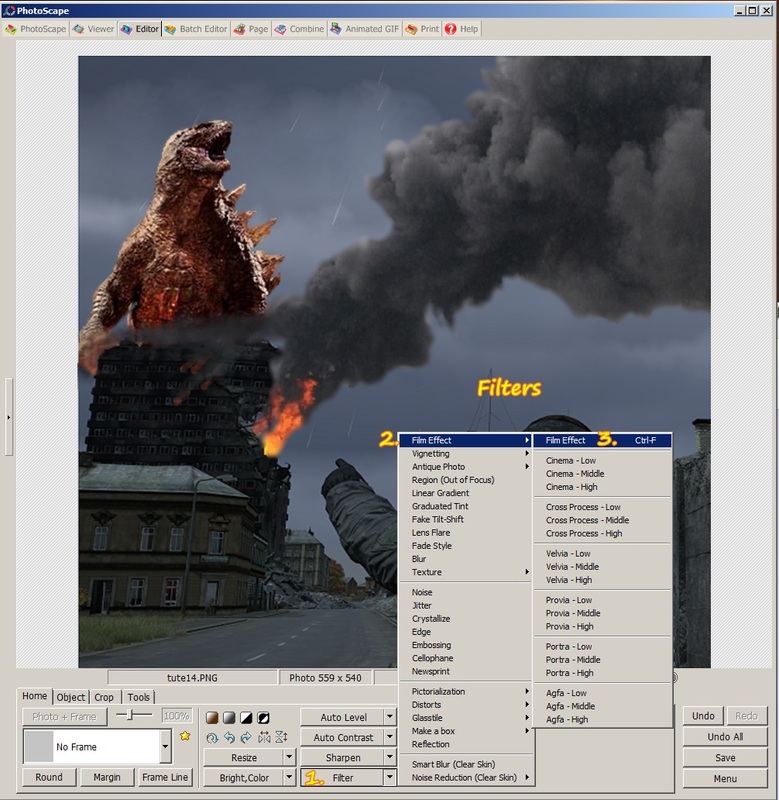
Now, as a finisher you can drop a filter on top of it. Some pics work with filters, some don't ..especially since instagram decided every picture in the world needs some sort of filter for people to go all oooh and aaahhh over. Subtle filters do work but it depends on the look you are going for. Filters are located bottom left HOME/FILTER/ PICK ONE. Games like DayZ can work nicely with a low filter but not always, again, it is up to your eye to try a few out and see if it works for the mood you are trying to set. I can't overstate it though, not everything needs a filter - excepting mainstream music, isn't that right Chad.
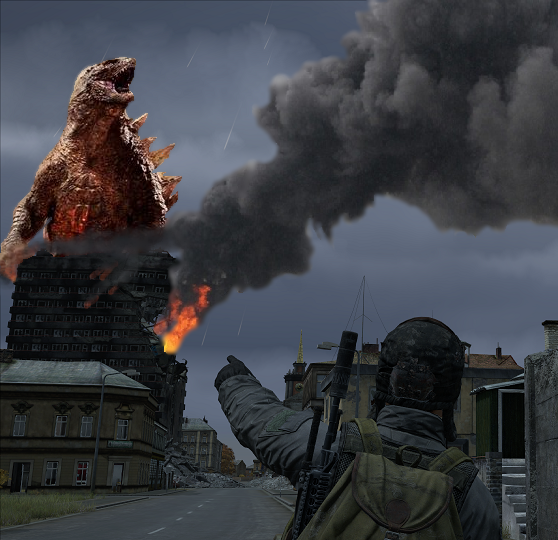
Our finished work, a masterpiece of sorts..it may have seemed like a long journey, and for the first few times it can be, but once you find your way around photoscape, or any other program like gimp and work out shortcuts and what tool preferences you like you can do something like this in ten or so minutes. Clearly i should have spent some more time finishing off with the pic below as it has some glaring dodginess about it still, but it is what it is, it's all about the journey maaaaan. Enjoy.
See below for some further dodgy work using the same methods.